Howdy, Stranger!
It looks like you're new here. If you want to get involved, click one of these buttons!
Quick Links
Step by Step Xsection

Hey team,
Just to set the expectations, I'm new to KLayout as well as Ruby scripting. In my job role I have been tasked to see if there is a possibility to run the Xsection add-on available within KLayout to achieve a step by step processing of the layout. In other words stopping the "cmos.xs" (https://github.com/klayoutmatthias/xsection/blob/master/docs/cmos.xs) after every step like deposition or etch or Litho to look at the process flow step by step.
In the language of code:
Is there a way to execute the "output" command one by one, controlled by a user input? The user input is expected to click a button, where the button(I'm envisioning) could be a QtDialog box awaiting the user to click "Next". From my self guided learning on Ruby and the code it seems difficult because the whole Xsection is an event and cannot have "pause and play" kind functions.
Please excuse, if my question is unclear or if it is a repeat question. I did try to search the forums but couldn't find any thing similar.
Comments
If you want to look at the mask output you first would have to execute the fab boolean operations on the layout. For this you would have to parse the boolean, and then combine layers into mask data. I think the functionality of stepping through the flow can be done after reading the use interface part of the KLayout reference.
I used Python instead of Ruby because there is a free very high quality parser generator available (written by David Beazley).
Also I used PyCharm as the IDE and drive KLayout with it. This is by far the fastest development environment for layout in the industry, since PyCharm is the by far best IDE (= Android Studio etc.). I think there may also be a Ruby plugin ...
Cheers, Erwin
Hi Asharma,
In general, a cross-section script has to prepared differently when you want to show the process progress. The concept is currently to keep the computed material outline internally and visualize it in a final step. If you put the output statements in the right places, supply a "wait" function and patch the output function to allow overriding outputs, a simple solution can be implemented.
This is an example for a modified .xs script which provides this feature:
Regards,
Matthias
@Matthias: Thanks to you too for the work around, it worked like a charm! I was able to stick your modified "output" and accomplish what I had set out to do. Also I forgot to mention this in my first comment, a big thanks for creating the Xsection as a whole, since it is a savior for my team and we are heavily dependent on it. So keep up the awesome work.
-Ankur
I would like to use this file.xs.
In which directory I have to copy it under .klayout folder?
Many thanks in advance
Hi Luciano,
you don't need to copy it. Just browse to it. But you need to install the XSection package first.
Matthias
Hi Matthias,
I copied the xsection.lym file from following link
http://sourceforge.net/p/xsectionklayout/code/HEAD/tree/trunk/src/xsection.lym?format=raw
to macros directory on .klayout folder.
I tried to use the xsection function on my gds file, using the file in attach, but I received the error message into the image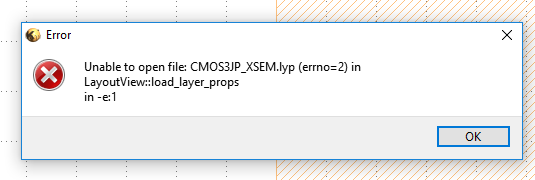
.
I'm using klayout on version 0.25
Can You explain me what am I doing wrong?
Many thanks in advance.
Luciano
You should rename "CMOS3JP_XSEM.lyp.txt" to "CMOS3JP_XSEM.lyp".
Matthias
Hi Luciano,
you can zip files for attaching them.
Anyway - don't use SourceForge anymore. Just install the xsection package (in Tools/Package Manager). Maintenance happens on GitHub (https://github.com/klayoutmatthias/xsection).
For your issue, try:
This should load the .lyp file relative to the .xs file.
Matthias
Hello!
Thank you very much for all your useful tools and tips.
I am using both the step by step xsection approach and the SVG exporter you kindly provided. I am wondering if there is a way to combine the two scripts so that at each step of the xsection the SVG exporter is lauched and saves a png file of the current cross-section. In the end, there should be all the png files generated by the SVG exporter at each step defined by the step by step xsection file.
Thank you in advance for your help.
Sophie