Creating an array with rotation

Hello everyone,

1) My question is about possibility to create an array of objects not only giving them x/y shift, but also a rotation. And maybe dependence of x coordinate (of the centre of the object) from the y coordiante. Is this possible in the klayout?

2) I stumbled upon this question during concrete problem: I want to make this kind of structures routinely.

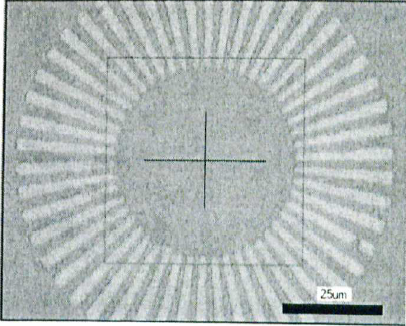
Any other approach to achieve the pattern on the picture without drawing and rotating parts by hand is welcome.

Comments

  • Hi,

    arrays are basic features of GDS/OASIS and don't offer this option :-(

    Coding comes to mind: such structures are easy to generate within a PCell. If you invest some time in setting this up, you'll get a flexible solution and you can even edit the star structure later.

    Here is such a PCell code:

    # Star PCell
    #
    # This sample PCell implements a library called "StarPCellLibrary" with a single PCell that
    # provides a circular ring of "rays". The parameters are:
    # 
    #  l: the layer
    #  r1: the inner radius of the ring in µm
    #  r2: the outer radius of the ring in µm
    #  n: the number of "rays"
    #  da: the angle one "ray" covers
    
    module StarPCellLibrary
    
      include RBA
    
      # Remove any definition of our classes (this helps when 
      # reexecuting this code after a change has been applied)
      StarPCellLibrary.constants.member?(:StarPCellLibrary) && remove_const(:StarPCellLibrary)
      StarPCellLibrary.constants.member?(:StarPCell) && remove_const(:StarPCell)
    
      # The PCell declaration for the circle
      class StarPCell < PCellDeclarationHelper
    
        include RBA
    
        def initialize
    
          # Important: initialize the super class
          super
    
          # declare the parameters
          param(:l, TypeLayer, "Layer", :default => LayerInfo::new(1, 0))
          param(:r1, TypeDouble, "Inner radius", :default => 1, :unit => "µm")
          param(:r2, TypeDouble, "Outer radius", :default => 5, :unit => "µm")
          param(:n, TypeInt, "Number of rays", :default => 32)     
          param(:da, TypeInt, "Ray angle", :default => 5, :unit => "deg")
    
        end
    
        def display_text_impl
          # Provide a descriptive text for the cell
          "StarPCell(L=#{l.to_s},R1=#{'%.3f' % r1.to_f},R2=#{'%.3f' % r2.to_f},N=#{'%d' % n.to_i},DA=#{'%.6g' % da.to_f})"
        end
    
        def produce_impl
    
          # This is the main part of the implementation: create the layout
    
          # compute the ray parts and produce the polygons
          d = Math::PI * da * 0.5 / 180.0
          a = 0.0
          n.times do |i|
            dpts = [
              DPoint::new(r1 * Math.cos(a - d), r1 * Math.sin(a - d)),
              DPoint::new(r1 * Math.cos(a + d), r1 * Math.sin(a + d)),
              DPoint::new(r2 * Math.cos(a + d), r2 * Math.sin(a + d)),
              DPoint::new(r2 * Math.cos(a - d), r2 * Math.sin(a - d))
            ]
            cell.shapes(l_layer).insert(DPolygon.new(dpts))
            a += Math::PI * 2 / n
          end
    
        end
    
      end
    
      # The library where we will put the PCell into 
      class StarPCellLibrary < Library
    
        def initialize  
    
          # Set the description
          self.description = "Star PCell Library"
    
          # Create the PCell declarations
          layout.register_pcell("StarPCell", StarPCell::new)
          # That would be the place to put in more PCells ...
    
          # Register us with the name "MyLib".
          # If a library with that name already existed, it will be replaced then.
          register("StarPCellLibrary")
    
        end
    
      end
    
      # Instantiate and register the library
      StarPCellLibrary::new
    
    end
    
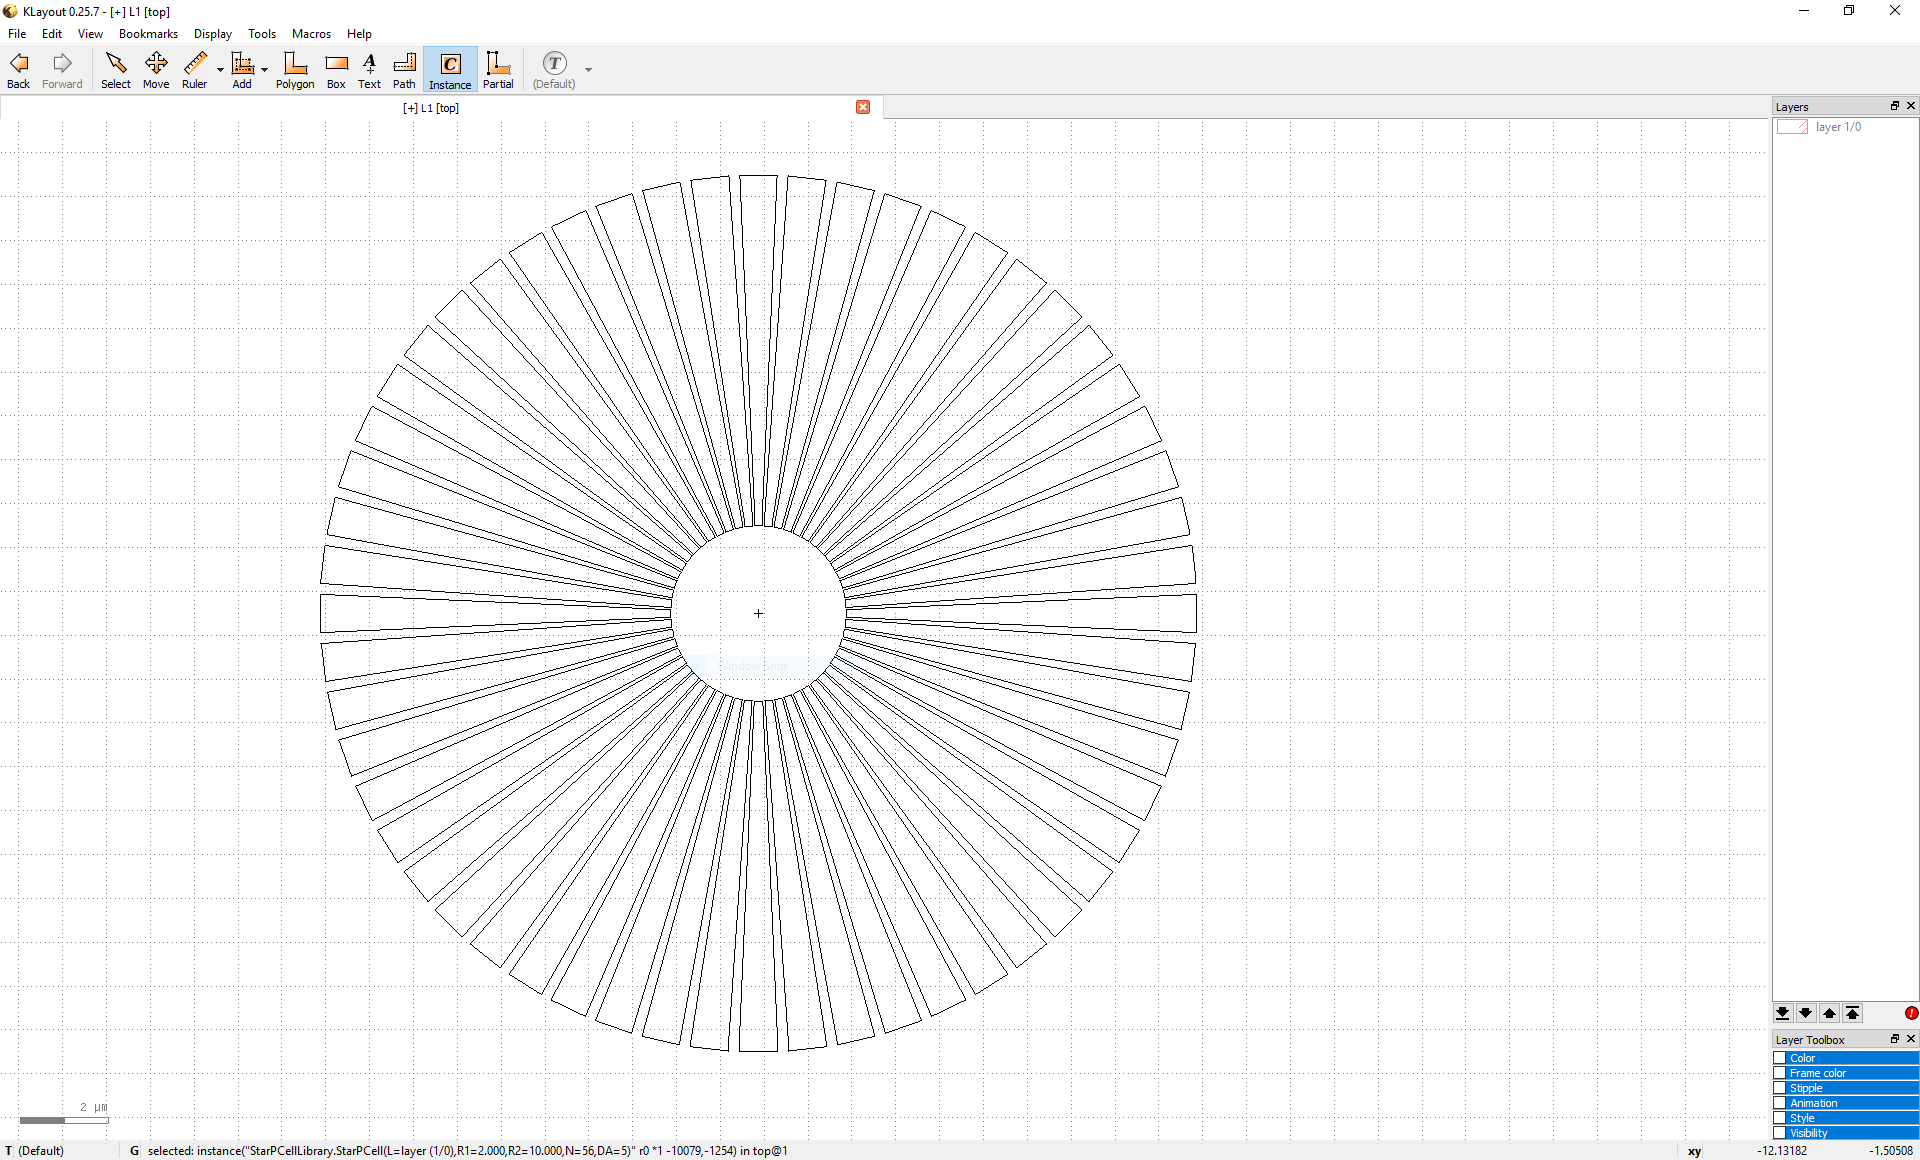
  • And here is how it looks like with the default parameters (r1=1, r2=5, n=32, da=5)

  • Thank you very much for your response!

    I have only one trouble now, I only used the GUI in the editor of the klayout. How do I use such a PCell (put simply, where to past the code? :smile: ). I see the main math part I can modify for my needs. Also, if you have a link to the examples how this works (Defining your own parametrized cells ) and how to start, I would be appreciate.

    Thank you again for your efforts and amazing answer.

  • Klayout has a full documentation that you should read for finding such answers: https://www.klayout.de/doc-qt4/programming/index.html
    Basically, in your case: press F5, go to "Ruby > [Local]", create a new general macro by clicking on the "+" sign, paste the script above, and press the "Run" button.

  • edited June 2019

    KLayout Package Index is a good place to start searching where and how to build your own pcells. Complete example of tech-pcell combination are KLayoutPhotonicPCells packages combined. Also a lot of tips and utilities are hidden inside ShapeLib, which for me as a package was very helpful.

    Of course KLayout's pcell macros templates and the documentation in general, are always showing the correct path you could follow for fast results.

    Chris

  • edited June 2019

    I got the Macrodevelopment window and the code was run (I assume so, since no errors were detected). But how do I get the actual design out in the editor or in the separate file?

    Also I can not even locate the macrosfile itself.

    I tried to follow the links you gave me, but in an hour I could not find the answer :neutral: .

    Also klayout has a specific folder for pymacros. But not for Ruby scripts, such as one from Matthias.

    Sorry in advance if I missed something simple :smile:

  • Hi alljust4forfun,

    An intro about script programming is here: https://www.klayout.de/doc-qt4/programming/introduction.html.

    I tried to record the steps for installing the macro and using it here: https://youtu.be/ACZjThs5asg

    Matthias

  • Thank you very much! Finally it worked!

    Funny, that I was doing it almost exactly like in the video.

    Maybe it will be useful for someone else: For me the problem was, because I was using old version of the klayout (namely 0.24.10). Then the output was like this:

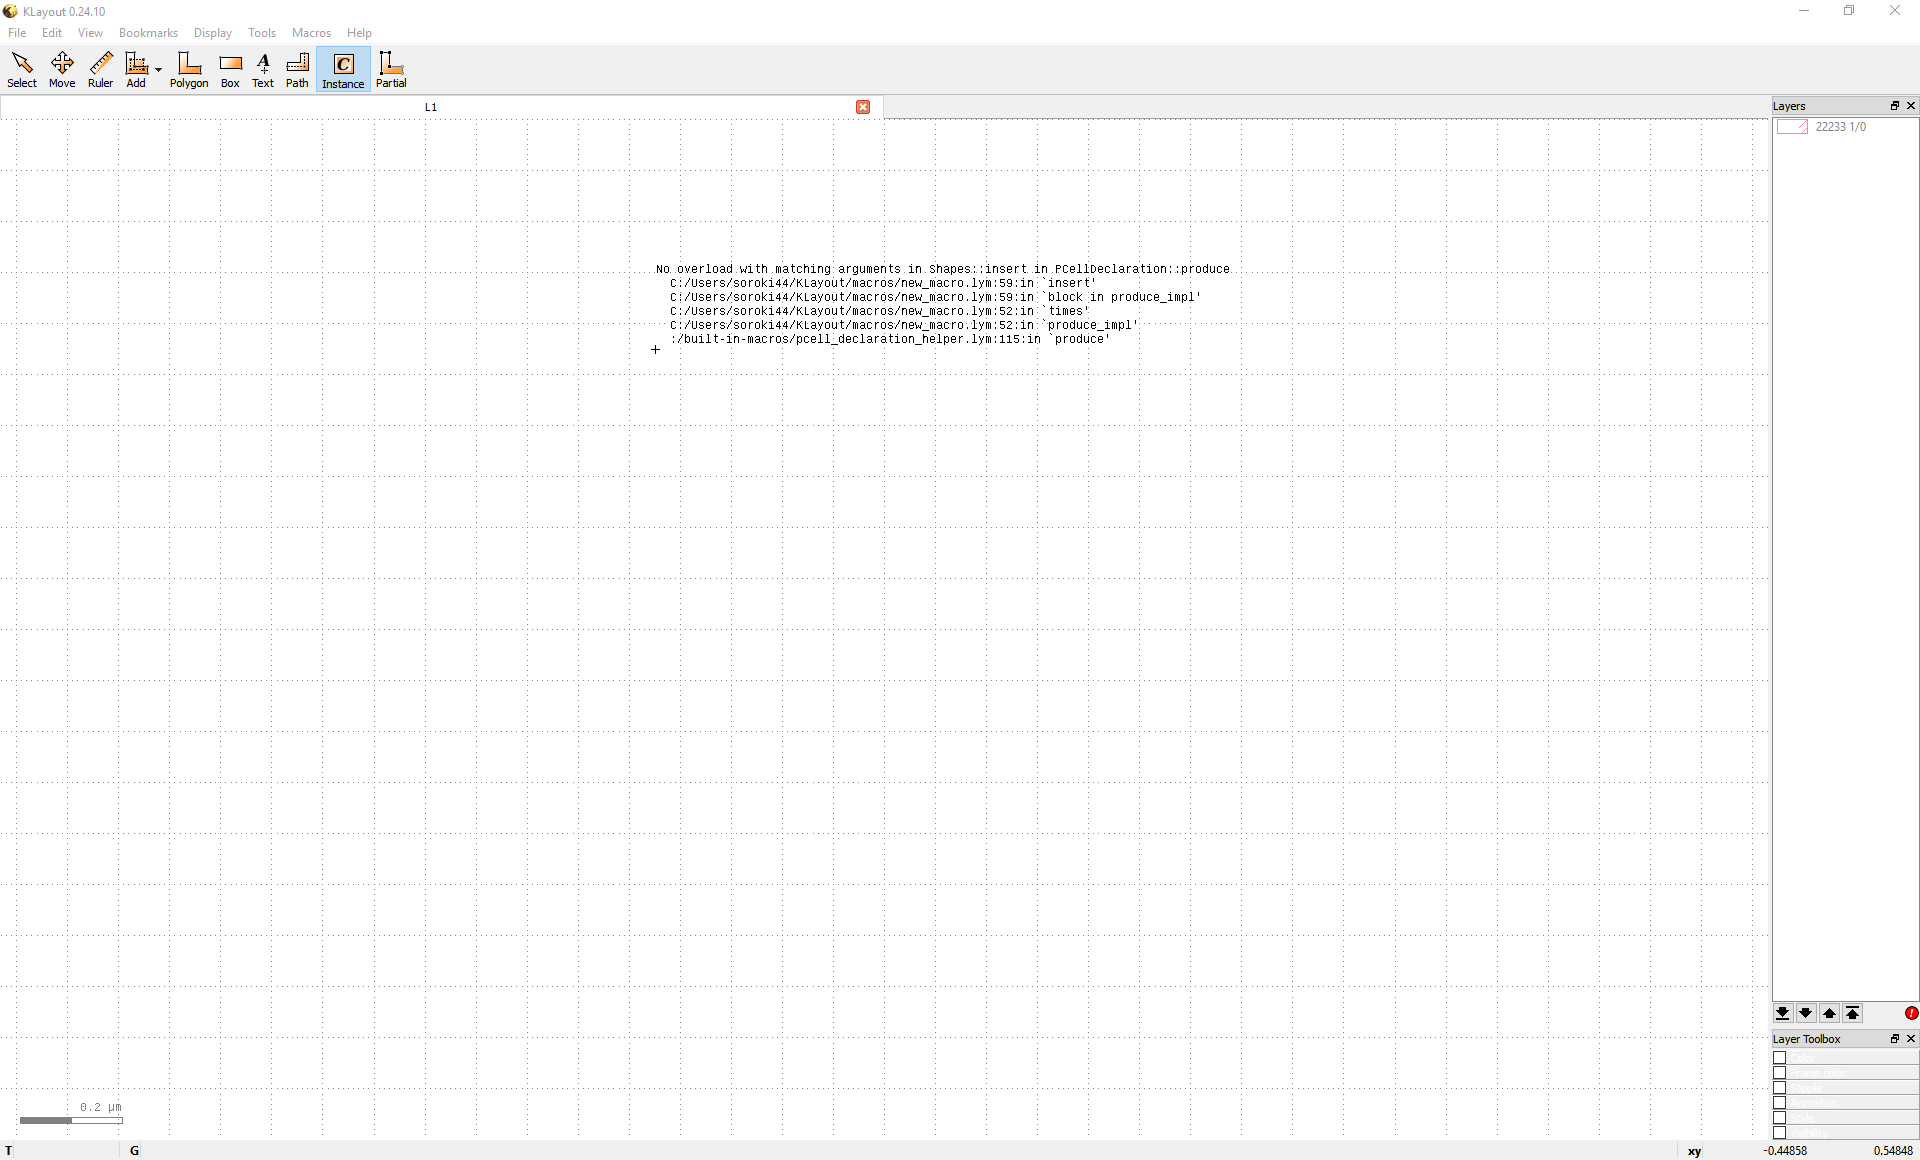
    But the newest version does it with no problems:

  • Oh yes ... 0.24.10 is really quite old now :-)

    Thanks for this feedback.

    Matthias

  • Hi Matthias,

    Firstly, thanks for developing KLayout, I've been using it for a few years and I'm always impressed with the versatility of the software. My query is that I cant find a script for a Ring array for an sub-cell (I bet its in front of my eyes but I just cant see it). is it possible to modify the code above to read in a sub-cell and ring array it (based on the sub-cell origin) with a given radius and given number of times.

    Thanks
    Richard

  • Hi Richard,

    creating a PCell which places a cell from the target layout cannot be done. The reason is that the PCell code isn't evaluated in the target layout but in the library it is defined in. Because this library does not have the cells of your layout, a PCell cannot create a reference to one of them.

    But it's possible to write a script which creates such a ring of cells:

    # Parameters (PLEASE EDIT):
    cell_to_place = "ACELL"
    radius = 100                       # radius in µm
    num = 32                           # number of cells
    center = RBA::DVector::new(0, 0)   # circle center in µm
    
    view = RBA::LayoutView::current
    
    begin
    
      # Undo/redo support
      view.transaction("Create ring of cells")
    
      ly = RBA::CellView::active.layout
      cell = RBA::CellView::active.cell
    
      cp = ly.cell(cell_to_place)
      cp || raise("Not a valid cell name: " + cell_to_place)
      cp_index = cp.cell_index
    
      num.times do |i|
    
        a = i.to_f * Math::PI * 2 / num.to_f
        a_degree = i.to_f * 360.0 / num.to_f
        pos = RBA::DVector::new(radius * Math::sin(a), radius * Math::cos(a)) + center
    
        trans = RBA::DCplxTrans::new(1.0, -a_degree, false, pos)
        inst = RBA::DCellInstArray::new(cp_index, trans)
        cell.insert(inst)
    
      end
    
    ensure
      view.commit
    end
    

    I hope it's self-explaining. Here's the result of a L-shape "ACELL":

    (how i love the new forum where you can copy/paste images :) )

    Matthias

  • Hi Matthias,
    As we say here, "you're a star".
    Many thanks
    Richard

  • Hi Matthias,
    Im not sure if your comment regarding "creating a PCell which places a cell from the target layout cannot be done" means I cant do what I'm looking for below, if not can you advise the code for placing a cell (such as "ACELL") in a x,y location.

    I hacked the 2 pieces of code above to make an array where each shape is equidistant from its surrounding shapes.

    I'm not a programmer so have very little idea of the code structure(and what I'm doing).
    Can you show me how to modify it to array a subcell similar to "ACELL" as in the code above?
    Do you have any tricks to allow me to specify odd numbers in stepping i.e. If "number of rows" odd then .... else.... so that I can fix "Number of rows".
    Maths is probably incorrect in the array stepping
    How do I change units to microns rather than nm but keep data base units as 0.001um?

    Thanks
    Richard

    Honey PCell

    #

    This sample PCell implements a library called "HoneyPCellLibrary" with a single PCell that

    provides a honeycomb array

    module HoneyPCellLibrary

    include RBA

    Remove any definition of our classes (this helps when

    reexecuting this code after a change has been applied)

    HoneyPCellLibrary.constants.member?(:HoneyPCellLibrary) && remove_const(:HoneyPCellLibrary)
    HoneyPCellLibrary.constants.member?(:HoneyPCell) && remove_const(:HoneyPCell)

    The PCell declaration for ??????

    class HoneyPCell < PCellDeclarationHelper

    include RBA

    def initialize

    Important: initialize the super class

    super

    declare the parameters

    l : Layer

    nr : Number of rows

    nc: Number of Columns

    p: Pitch

    param(:l, TypeLayer, "Layer", :default => LayerInfo::new(1, 0))
    param(:nc, TypeInt, "Number of Columns", :default => 5)
    param(:nr, TypeInt, "Number of Rows", :default => 5)
    param(:p, TypeInt, "Pitch", :default => 20)
    end

    def display_text_impl

    Provide a descriptive text for the cell ???

    "HoneyPCell(L=#{l.to_s},N=#{'%d' % nr.to_i})"
    end

    def produce_impl

    Define shape step

    x = 0.0
    y = 0.0

    s: vertical stepping pitch

    s = Math::sqrt((pp)-((p/2)(p/2)))

    row loop

    nr.times do |i|

    Column loop

    nc.times do |i|

    shapes to be looped

    first row of 10x10 boxes

    cell.shapes(l_layer).insert(RBA::Box::new(x, y,x+10,y+10 ))

    second row of 10x10 boxes

    cell.shapes(l_layer).insert(RBA::Box::new(x+(p/2), y+s, x+(p/2)+10,y+s+10 ))

    x = x+p

    end column loop

    end

    x=0
    y = y+(s*2)

    end row loop

    end

    end

    end

    The library where we will put the PCell into

    class HoneyPCellLibrary < Library

    def initialize

    Set the description

    self.description = "Honey PCell Library"

    Create the PCell declarations

    layout.register_pcell("HoneyPCell", HoneyPCell::new)

    That would be the place to put in more PCells ...

    Register us with the name "MyLib".

    If a library with that name already existed, it will be replaced then.

    register("HoneyPCellLibrary")

    end

    end

    Instantiate and register the library

    HoneyPCellLibrary::new

    end

  • edited February 2020

    Hi Richard,

    could you format the code above so it becomes readable? Markdown uses a single line with triple backticks before and after the code to format it.

    But I think I'm not getting the idea. This discussion is about circular arrays, but the picture show is kind of different. Could you explain in a few words what your intention is? What do you mean be "ring array"?

    Thanks,

    Matthias

  • Hi Matthias,

    Sorry for the confusion. The circular (ring) array code that you wrote was perfect for what I was looking for.

    This in a new query:
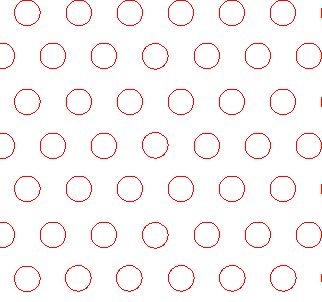
    I would like to create an array of a single cell (similar to ACELL in the code above) where the cell is equidistant from its surrounding (6) cells as in the picture above where the center of the circle is equidistant from the center of each of the 6 circles that surround it.

    I hacked the 2 pieces of code above to make an array where each defined square is equidistant from its surrounding squares.

    I'm not a programmer so have very little idea of the code structure(and what I'm doing).
    Can you show me how to modify it to array a cell (similar to "ACELL" )rather than a polygon?
    (Im not sure if your comment above "creating a PCell which places a cell from the target layout cannot be done" means I cant do this).

    The code creates 2 rows of polygons at a time and repeats this.
    Do you have any tricks to allow me to specify odd numbers of rows? i.e. If "number of rows" odd then .... else....

    How do I change units to microns rather than nm but keep data base units as 0.001um? Is it by setting the scale to 1000?

    I have generated arrays like this in the past where individuals required equally spaced sensor (thus higher packing) or for etching holes in Silicon for MEMS devices however I wrote the code in Mentor Graphics Ample script.

    Thanks
    Richard

    # Honey PCell
    #
    # This sample PCell implements a library called "HoneyPCellLibrary" with a single PCell that
    # provides a honeycomb array
    
    module HoneyPCellLibrary
    
    include RBA
    
    # Remove any definition of our classes (this helps when 
    # reexecuting this code after a change has been applied)
    HoneyPCellLibrary.constants.member?(:HoneyPCellLibrary) && remove_const(:HoneyPCellLibrary)
    HoneyPCellLibrary.constants.member?(:HoneyPCell) && remove_const(:HoneyPCell)
    
    # The PCell declaration for ??????
    class HoneyPCell < PCellDeclarationHelper
    
    include RBA
    
    def initialize
    
    # Important: initialize the super class
    super
    
    # declare the parameters
    # l : Layer 
    # sq : size of square to be arrayed
    # nr : Number of rows
    # nc: Number of Columns
    # p: Pitch
    
    param(:l, TypeLayer, "Layer", :default => LayerInfo::new(1, 0))
    param(:sq, TypeInt, "Square size", :default => 5)
    param(:nc, TypeInt, "Number of Columns", :default => 5) 
    param(:nr, TypeInt, "Number of Rows", :default => 5)
    param(:p, TypeInt, "Pitch", :default => 20)
    end
    
    def display_text_impl 
    # Provide a descriptive text for the cell ???
    "HoneyPCell(L=#{l.to_s},N=#{'%d' % nr.to_i})"
    end
    
    def produce_impl
    # Define shape step
    x = 0.0
    y = 0.0
    # s: vertical stepping pitch 
    s = Math::sqrt((p*p)-((p/2)*(p/2))) 
    
    # row loop
    nr.times do |i|
    
    # Column loop
    nc.times do |i|
    
    # shapes to be looped
    
    # first row of boxes
    cell.shapes(l_layer).insert(RBA::Box::new(x, y,x+sq,y+sq ))
    
    # second row of boxes offset by p/2 in X and s in Y
    cell.shapes(l_layer).insert(RBA::Box::new(x+(p/2), y+s, x+(p/2)+sq,y+s+sq )) 
    
    x = x+p
    # end column loop
    end
    
    x=0
    y = y+(s*2)
    # end row loop
    end
    
    end
    
    end
    
    # The library where we will put the PCell into 
    class HoneyPCellLibrary < Library
    
    def initialize 
    
    # Set the description
    self.description = "Honey PCell Library"
    
    # Create the PCell declarations
    layout.register_pcell("HoneyPCell", HoneyPCell::new)
    # That would be the place to put in more PCells ...
    
    # Register us with the name "MyLib".
    # If a library with that name already existed, it will be replaced then.
    register("HoneyPCellLibrary")
    
    end
    
    end
    
    # Instantiate and register the library
    HoneyPCellLibrary::new
    
    end
    
  • Hi,

    yes, the code's readability has enhanced.

    Here is some enhanced code. Micrometer units can be enabled by using "DBox" rather than "Box". Then "sq" and "p" become floating-point values in micrometer units.

    Second, to generate the pattern in a more generic sense you could consider the boxes to be placed on the "white" fields of a chess board. The x pitch of the board is p/2 and the y pitch s. You can specify any even or odd number of rows or columns.

    # Honey PCell
    #
    # This sample PCell implements a library called "HoneyPCellLibrary" with a single PCell that
    # provides a honeycomb array
    
    module HoneyPCellLibrary
    
      include RBA
    
      # Remove any definition of our classes (this helps when 
      # reexecuting this code after a change has been applied)
      HoneyPCellLibrary.constants.member?(:HoneyPCellLibrary) && remove_const(:HoneyPCellLibrary)
      HoneyPCellLibrary.constants.member?(:HoneyPCell) && remove_const(:HoneyPCell)
    
      # The PCell declaration for ??????
      class HoneyPCell < PCellDeclarationHelper
    
        include RBA
    
        def initialize
    
          # Important: initialize the super class
          super
    
          # declare the parameters
          # l : Layer 
          # sq : size of square to be arrayed
          # nr : Number of rows
          # nc: Number of Columns
          # p: Pitch
    
          param(:l, TypeLayer, "Layer", :default => LayerInfo::new(1, 0))
          param(:sq, TypeDouble, "Square size", :default => 5, :unit => "µm")
          param(:nc, TypeInt, "Number of Columns", :default => 5) 
          param(:nr, TypeInt, "Number of Rows", :default => 5)
          param(:p, TypeDouble, "Pitch", :default => 20, :unit => "µm")
        end
    
        def display_text_impl 
          # Provide a descriptive text for the cell ???
          "HoneyPCell(L=#{l.to_s},N=#{'%d' % nr.to_i})"
        end
    
        def produce_impl
          # Define shape step
          x = 0.0
          y = 0.0
          # s: vertical stepping pitch 
          s = Math::sqrt((p*p)-((p/2)*(p/2))) 
    
          # row loop
          nr.times do |j|
    
            # Column loop
            nc.times do |i|
    
              # shapes to be looped
    
              # selects all "white" fields in a chess board          
              if (i + j) % 2 == 0
                cell.shapes(l_layer).insert(RBA::DBox::new(x, y,x+sq,y+sq ))
              end
    
              x = x+p/2
    
              # end column loop
            end
    
            x=0
            y = y+s
    
            # end row loop
          end
    
        end
    
      end
    
      # The library where we will put the PCell into 
      class HoneyPCellLibrary < Library
    
        def initialize 
    
          # Set the description
          self.description = "Honey PCell Library"
    
          # Create the PCell declarations
          layout.register_pcell("HoneyPCell", HoneyPCell::new)
          # That would be the place to put in more PCells ...
    
          # Register us with the name "MyLib".
          # If a library with that name already existed, it will be replaced then.
          register("HoneyPCellLibrary")
    
        end
    
      end
    
      # Instantiate and register the library
      HoneyPCellLibrary::new
    
    end
    

    Finally, if you want to produce circles instead of boxes use:

                cell.shapes(l_layer).insert(RBA::DPolygon::ellipse(RBA::DBox::new(x, y,x+sq,y+sq), 100))
    

    Here, "100" is the number of points per circle. Circles are approximated by polygons.

    Matthias

  • Excellent Matthias
    Thanks

Sign In or Register to comment.