Howdy, Stranger!
It looks like you're new here. If you want to get involved, click one of these buttons!
Quick Links
Adding and editing an image

Hi guys,
A quick thank you to all who chipped in on previous issue. Got it sorted in the end with inputs from a number of people.
My next issue may be a simple one or not, but have tried to find solution with no luck.
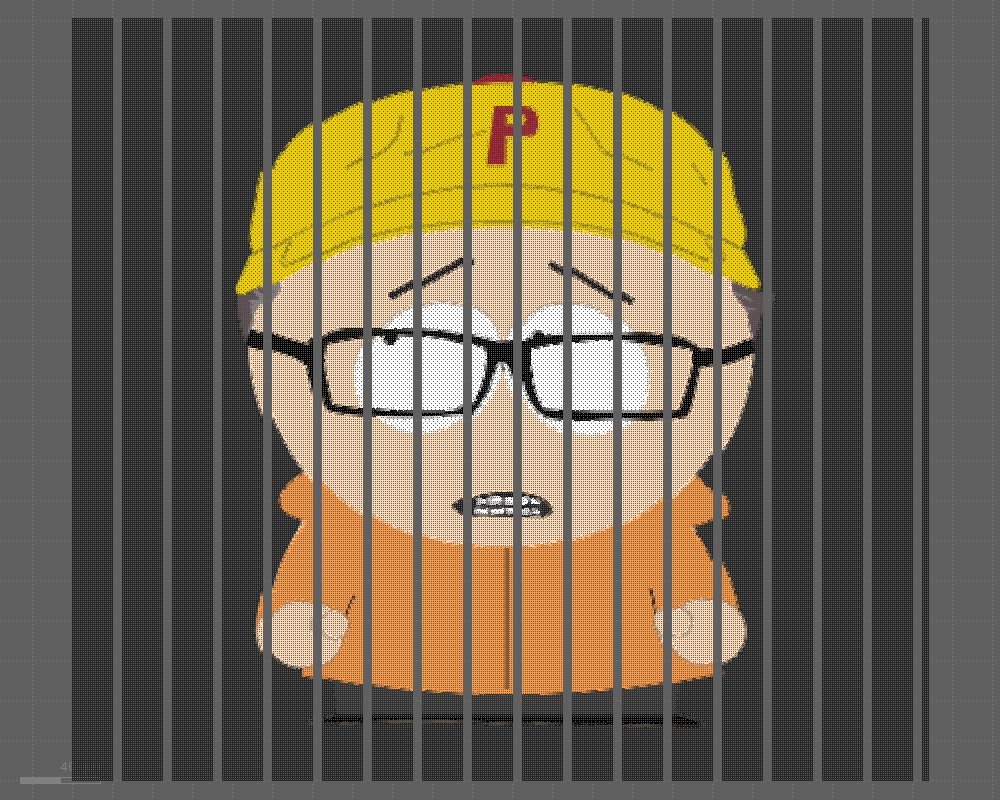
I am trying to add an image and then edit it. What I want to do is slice the image into a number of strips, and separate the image strips a specified distance away from each other. The idea is to create a comb effect, and to be clear, I am not wanting to delete any part of the image, just to separate it into strips that if recombined, would make up the original image.
Any and all help is appreciated,
Karl
Comments
Import, put on appropriate layer etc.
Then I'd use the Edit>Subtract others from first after overlaying "cutter" stripes where you want stuff gone.
Cool solution")
I could not find a gf2gds program on the net.
But here is a small piece of code turning an image into a layout:
Matthias
Hi guys,
Thanks for your help. I have used that gf2gds method and although it imports and you can make some changes, I cant seem to separate the image into strips, only delete the strips which I don't want to do. The image need to cut into strips and expanded out wards.
Again, any help etc etc
Karl
Do these images look like what you want?


Yes!! Exactly!
OK. Then, the attached solution of mine will help.

But you need to modify the lines shown below to reflect your environment.
Good luck!
Kazzz-S
OK, thats sounds good. But you have to remember I am very much a novice at this. Do i save these files in the Klayout folder as a GDS file?
Regards
Karl
Location of the three files
KazzzS-KL2158A.py

A brief usage is given in the script, as shown below.
If you are using KLayout on Window, the right place would be:
C:\Users\YOUR_USER_NAME\KLayout\pymacros\avatar.png
Any place. However, you need to set the full path to the image file in line 128 like:
imgSrc = "C:/MyWork/avatar.png"KazzzS-KL2158A.lyp
Any place.
Step-by-step operations (Images captured on macOS)


Saving the layout
This script does not generate any output file in GDS2 or other formats.
You can manually do so.
Or you can add some more code to save the layout automatically. ===> Reference
Kazzz-S
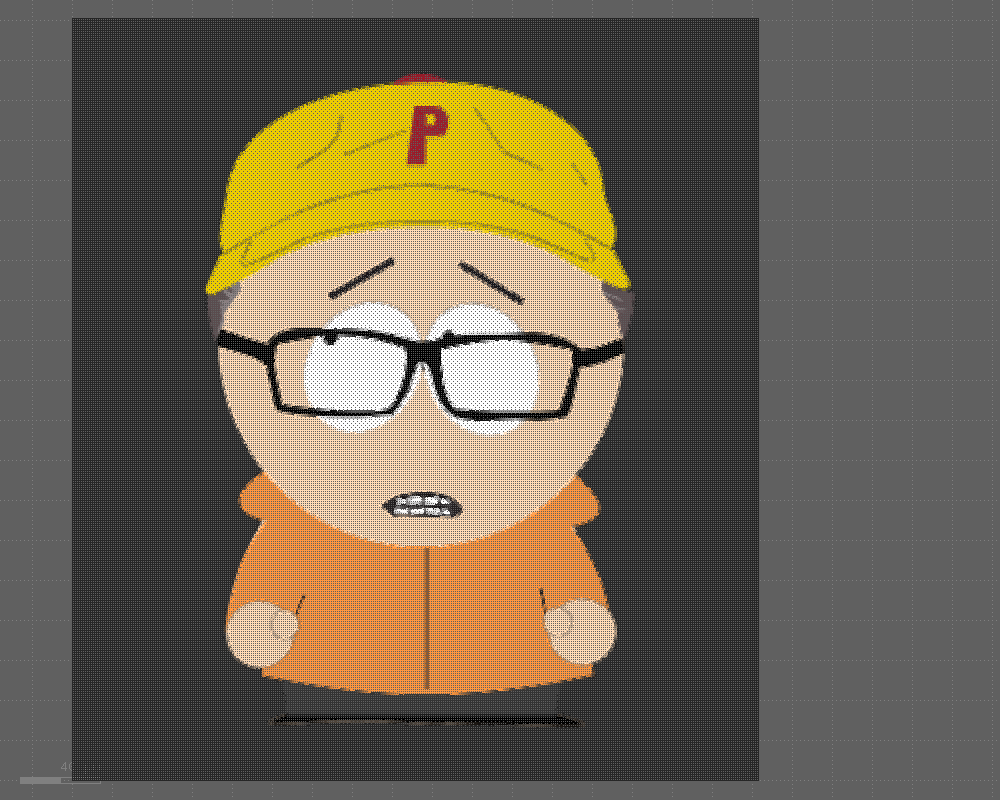
Well that seems to have worked a treat as they say. I do have one question though. Is it possible to keep the image in its original colour? It has broken the image into three layers, each layer a whatever colour you choose, but I was hoping to keep the image as it was - in full colour.
Since I do not fully understand the problem you are trying to solve, I cannot imagine the usefulness of keeping the original colors in a layout.
However, one idea is to store pixels (converted to Box shapes) having the same color in a particular layer.
A drawback is that the number of layers can quickly become large if an input image contains many distinct colors. For example, in the case of
avatar.png, I've found 3117 different colors.Because of many such layers, the brute-force approach I have shown above takes time.
More precisely, generating the outputs below took about 500 sec on my Mac.
Please refer to the second PYA script for more details.
Kazzz-S
2022-09-29: updated the code
Thanks for this nice discussion!")
I also wonder what sense it makes to keep the layer colors. After all maybe you actually need an image processing library?
Matthias
Hi everyone,
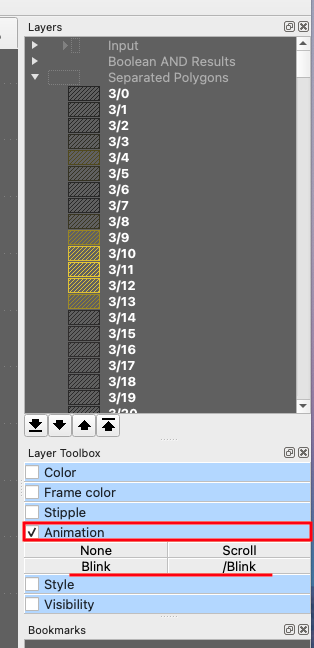
I was away for a bit, so have started back at this. Just a quick question though. How do i switch of the function for blink?
Probably something very silly no doubt!
Select a layer, or multiple layers, then follow
Layer Toolbox--->Animation--->Blinkor/Blink(inverse timing).Noneto turn off.Kazzz-S